Are you ready to tackle another series of fun Raspberry Pi projects this weekend? I’m going to ride with you and build my own E-Ink calendar display, plus show you Open Voice OS and how to build your own Raspberry Pi powered dash cam.

- Brand
-
Raspberry Pi
- UPC
-
Cortex-A72 (ARM v8)
With the Raspberry Pi 4 Model B, you can create all kinds of fun projects and upgrade devices around your home. Alternatively, install a full desktop operating system and use it like a normal computer.
Know what your day has in store with an e-ink calendar display
Your calendar at a glance
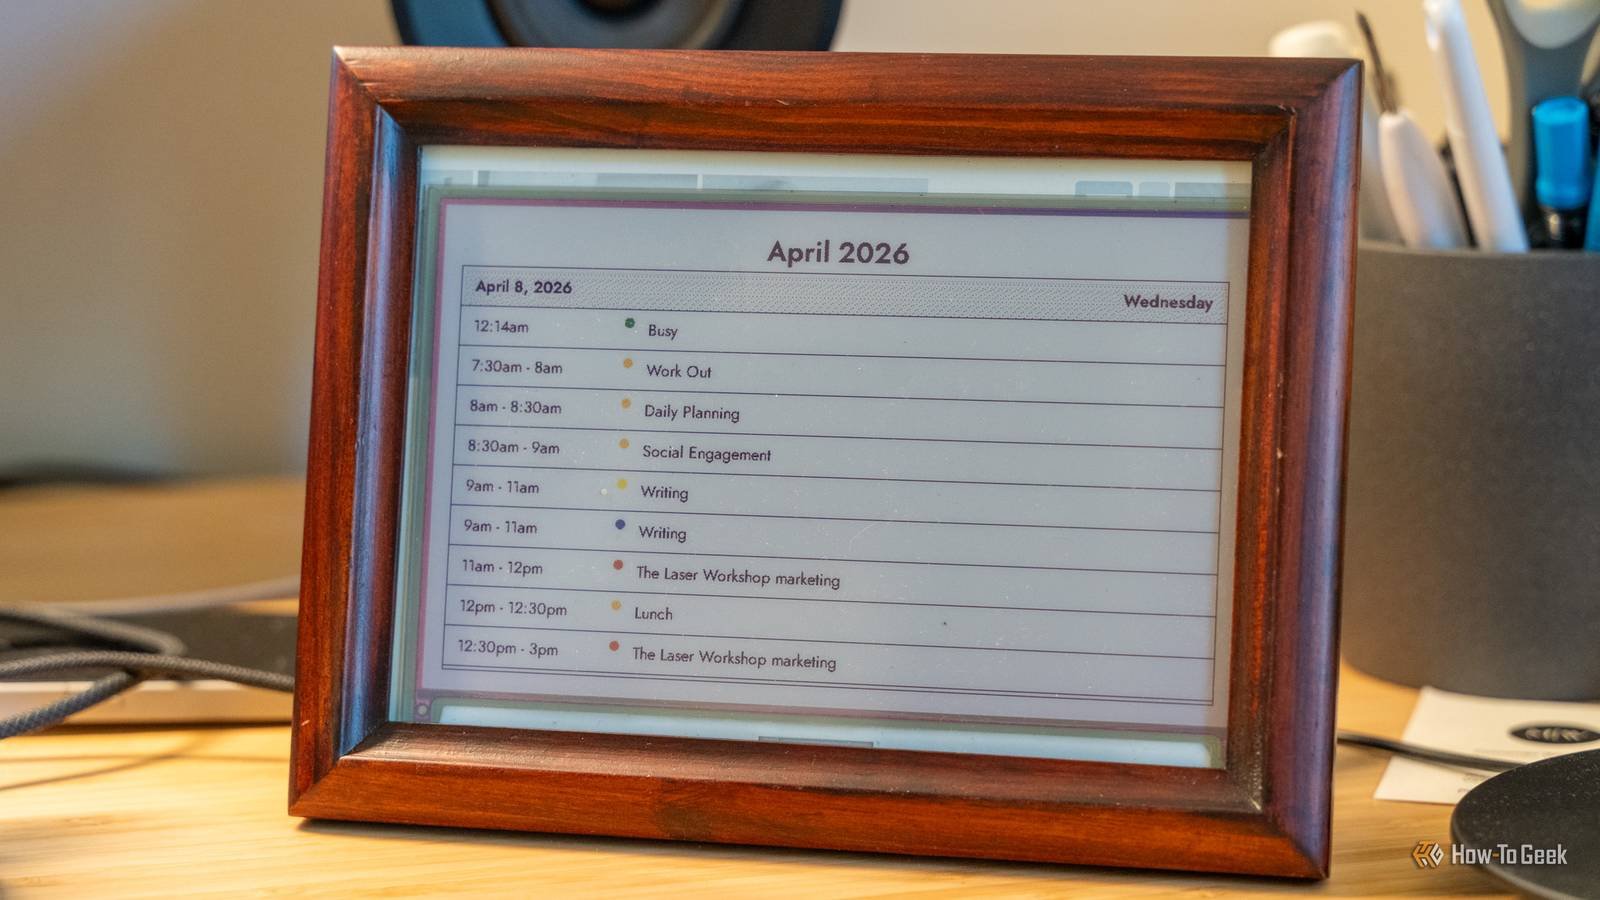
I’ve wanted to have an e-ink calendar on my desk for a while, but only recently sat down to build one myself, and for that, I used InkyPi.
The InkyPi project is made by YouTuber AKZ Dev and is actually a pretty solid platform to use. It has support for displaying a clock, calendar, NASA Photo of the Day, Unsplash images, AI-generated images, and much more.
InkyPi works off of a “playlist” platform, so you can create multiple playlists that you use at different times of the day. A playlist can have your calendar, to-do list, and an RSS feed of work. Another might have family photos, previews of the year, and a daily comic.
I love how simple InkyPi works, I was able to get mine up and running in about five minutes with my Pi 4 B, although it works from the Pi 3. I’m using InkyPi with my Waveshare 7.3-inch color e-ink displaywhich it works great with, but is also compatible with a host of other displays, including Pimoroni’s Inky Impression.
I don’t know exactly what I’ll keep my playlist set to, but I’ve played with a lot of the plugins so far and love the way they look. So I’ll probably alternate between my calendar, the weather, NASA Photo of the Day, and a few other things. I am delighted with the capabilities of InkyPi and how easy it was to set up.
If you’ve been putting off that e-ink display project, let this weekend be the time you finally tackle it.
Create your own Alexa with Open Voice OS
Don’t let Amazon spy on you
If you’re tired of companies spying on their voice-controlled assistants, then a Pi is the perfect tool to create your own. Open voice operating system is a community-driven open source platform that allows you to create custom voice-enabled devices. It uses online speech-to-text services by default, but can be configured to use offline models if you want to further enhance your smart home privacy.
The customizable user interface is easy to navigate and configure, and Open Voice OS can run on a wide range of devices, from Raspberry Pi to Linux computers, and even just run in a Docker container. The choice is yours on how you want to handle the core of the platform. For the Raspberry Pis, there are cliparts you can download that will get you up and running in no time.
If you choose to go offline with Open Voice OS, it may be completely offline, meaning wake words, speech-to-text, text-to-speech, and more can be done locally.
The platform is skill-based, meaning that the community can develop (and has developed many) skills for the platform, allowing it to expand its capabilities with ease. It also integrates with Home Assistant natively to control your smart home devices. There are also PHAL plugins, which means you can integrate it with hardware connected to your controller, such as LED rings, displays, or buttons.
Open Voice OS is, after all, one of the best ways to create your own privacy-focused voice assistant in your smart home. Setup is simple, but setup can take a while to connect, so be sure to buckle up for a weekend full of tweaking as you prepare your first local voice assistant.
Build your own dash cam
Have full control of your car audio recording

Everyone should have a dash cam in their car these days, and building your own is the only thing you can do if you’re a handyman. Building a dash cam with Raspberry Pi is actually easier than you think and only takes a few lines of code.
To start, you need to decide what you want to power the dash cam. I would recommend a Pi Zero as it consumes the least amount of power and takes up the least space. Next, find out where you plan to mount it.
From there, you just need follow this simple guide to configure it to record to the microSD card and connect any USB camera to one of the Pi’s USB ports. As long as you supply power to the Pi, it will boot up and start recording.
There’s even a way to have the script check how much space is left on the microSD card and delete old footage to free up storage for new recordings, ensuring it won’t stop recording if you run out of storage.
If you want to get fancier, you can even add a GPS hat to the Pi, which can record your location and recording speed, although the script will need to be updated to be able to pass that information to ffmpeg for recording.
- Brand
-
Raspberry Pi
- UPC
-
ARM Cortex-A53 quad-core 64-bit
The Raspberry Pi Zero 2W is super small and super affordable, but has enough computing power for a variety of DIY projects. You can use it to create a portable retro game console, for Klipper/Mainsail, a super compact home or media server, and more.
Stop putting off your Pi projects and just do them
I’ve had the eInk display in my office closet for months now. I did a few things with it when I first bought it, but otherwise I let it sit. Today I decided to take the few minutes I needed to set up InkyPi and I’m so glad I did.
Don’t be like me and leave projects for another day, just do them now. These Pi projects aren’t that difficult and you’ll be much happier when you’re done.