

Introduction
I had 94% test coverage on a React app. Components, hooks, edge cases that no one thinks about. In that same sprint, I pushed an API change that broke authentication for anyone who hadn’t logged in recently. I discovered it three hours later through a support ticket.
The test suite was green the entire time.
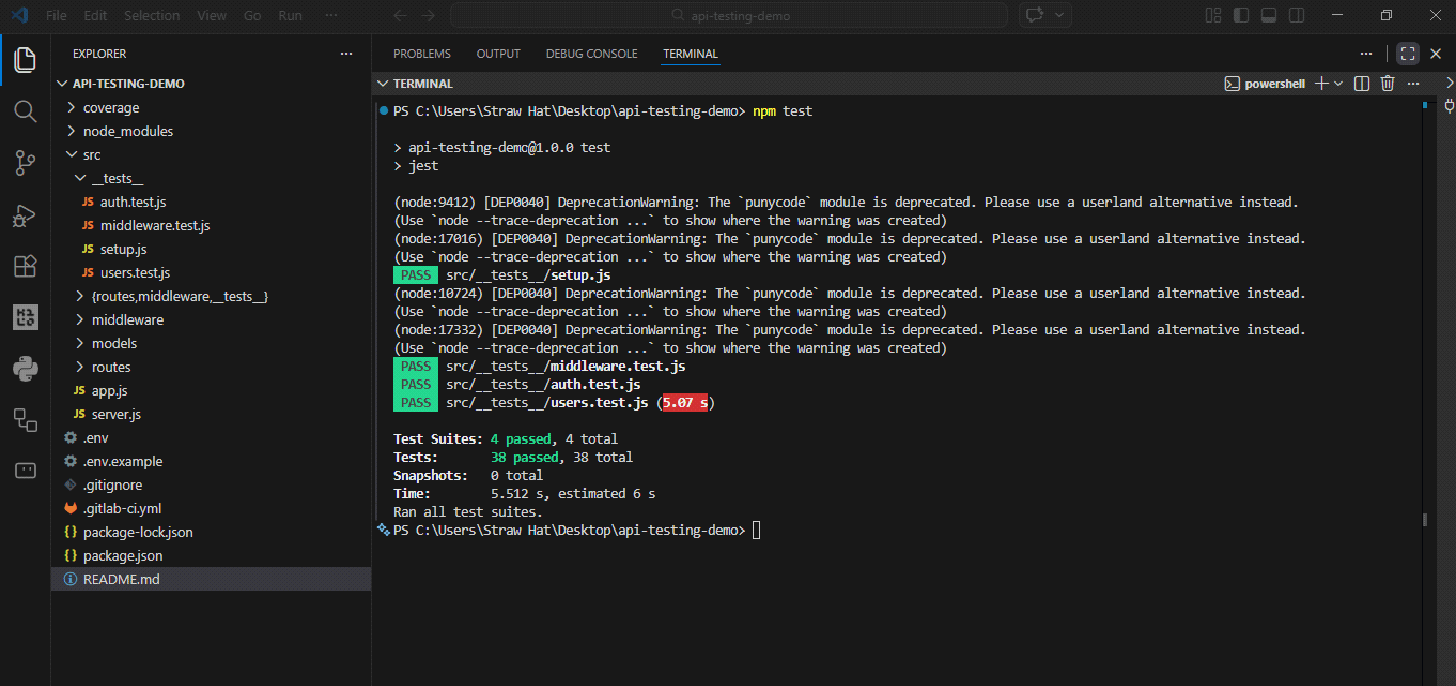
If you know Jest for React, you already know 80% of what you need to test an Express API. The other 20% is a different test environment and a library you haven’t used yet. This article covers that 20%.
The configuration
Start with a simple Node project. No Create React app, no framework opinions. Express only.
mkdir api-testing-demo
cd api-testing-demo
npm init -y
npm install express
npm install --save-dev jest supertest @types/jest
You know Joke. Super test It’s the new piece. It allows you to send HTTP requests directly to your Express application without starting a server on a real port. Instead of rendering components, you’re hitting endpoints. The test model is identical and the objective is different.
Add this to package.json:
{
  "scripts": {
    "test": "jest",
    "test:watch": "jest --watch",
    "test:coverage": "jest --coverage"
  },
  "jest": {
    "testEnvironment": "node",
    "coverageDirectory": "coverage",
    "collectCoverageFrom": (
      "src/**/*.js",
      "!src/server.js"
    )
  }
}
testEnvironment: "node" It’s the one that catches people first. Jest defaults to jsdom, the browser-like environment built for React. Global nodes like process do not behave correctly there. Set it to node and everything works as expected.
Folder structure:
api-testing-demo/
├── src/
│   ├── app.js
│   ├── server.js
│   ├── routes/
│   │   └── users.js
│   └── __tests__/
│       └── users.test.js
└── package.json
app.js exports the Express application. server.js he cares and calls listen(). Keep them separate. Yeah listen() lives in app.jseach test file that the application imports attempts to bind a real port. you will get PORT already in use errors and spending time debugging something that is not a testing problem. Small separation, big impact on reliability.
Test routes without a server
A basic route:
const express = require('express');
const router = express.Router();
router.get("https://www.sitepoint.com/", (req, res) => {
  res.json({ users: () });
});
router.post("https://www.sitepoint.com/", (req, res) => {
  const { name, email } = req.body;
  if (!name || !email) {
    return res.status(400).json({ error: 'Name and email required' });
  }
  res.status(201).json({ id: 1, name, email });
});
module.exports = router;
And the proof:
const request = require('supertest');
const app = require('../app');
describe('GET /users', () => {
  it('returns empty array when no users exist', async () => {
    const response = await request(app)
      .get('/users')
      .expect('Content-Type', /json/)
      .expect(200);
    expect(response.body.users).toEqual(());
  });
});
describe('POST /users', () => {
  it('creates a new user with valid data', async () => {
    const newUser = { name: 'Godstime', email: 'godstime@example.com' };
    const response = await request(app)
      .post('/users')
      .send(newUser)
      .expect('Content-Type', /json/)
      .expect(201);
    expect(response.body.id).toBeDefined();
    expect(response.body.name).toBe(newUser.name);
    expect(response.body.email).toBe(newUser.email);
  });
  it('returns 400 when name is missing', async () => {
    const response = await request(app)
      .post('/users')
      .send({ email: 'test@example.com' })
      .expect(400);
    expect(response.body.error).toBe('Name and email required');
  });
});
The pattern is to organize, act and assert like React Testing Library. Supertest’s .expect() handles status codes and headers. Jest’s expect() handles the body. If you’ve written component tests, this isn’t a new skill.
Test error cases. APIs fail in production more creatively than they succeed. Missing fields, wrong types, IDs that don’t exist. The happy path that passes means that you have tried the only scenario in which nothing goes wrong.
One thing that will cost you an hour if you miss it is always waiting for your Supertest calls. Without it, Jest sees the test function return and marks it as passed before the request completes. The test is green and wrong at the same time.
it('creates user', () => {
  request(app).post('/users').send(data);
});

it('creates user', async () => {
  await request(app).post('/users').send(data);
});
The joke won’t warn you. It just happens.
Mock database
Getting to a real database in tests is slow, leaves data behind, and eventually causes tests to break each other. One test creates a user, the next expects an empty collection, and now you’re chasing a bug that has nothing to do with the code you changed.
The pattern is to isolate the database before the suite runs, clean it between each test, and tear it down when finished. That’s all.
For MongoDB, use the MongoDB memory server:
npm install --save-dev mongodb-memory-server
const { MongoMemoryServer } = require('mongodb-memory-server');
const mongoose = require('mongoose');
let mongoServer;
beforeAll(async () => {
  mongoServer = await MongoMemoryServer.create();
  await mongoose.connect(mongoServer.getUri());
});
afterAll(async () => {
  await mongoose.disconnect();
  await mongoServer.stop();
});
afterEach(async () => {
  const collections = mongoose.connection.collections;
  for (const key in collections) {
    await collections(key).deleteMany();
  }
});
This starts a real MongoDB instance in memory. It spins up in less than a second, completely isolated from your development database. He afterEach cleanliness is what prevents the tests from interfering with each other. Skip it and your tests will pass individually and fail as a whole. Error messages will not prompt you here. That’s the fun part.
For SQL databases, in-memory SQLite works the same way:
module.exports = {
  test: {
    client: 'sqlite3',
    connection: ':memory:',
    useNullAsDefault: true,
    migrations: {
      directory: './migrations'
    }
  }
};
With the database connected, you can go a level deeper and directly assert, not only what the API responded to but what actually ended up stored.
it('actually saves the user', async () => {
  const newUser = { name: 'Godstime', email: 'godstime@example.com' };
  await request(app)
    .post('/users')
    .send(newUser)
    .expect(201);
  const saved = await User.findOne({ email: newUser.email });
  expect(saved).toBeTruthy();
  expect(saved.name).toBe(newUser.name);
});
The difference between testing what the API claims it did and testing what it actually did.
Authentication and middleware
Protected routes are where the time investment pays off. Manually testing authentication means generating a token, pasting it into Postman, remembering to test the tokenless case, and repeating everything after each change. The tests run everything in two seconds.
The middleware:
const authenticate = (req, res, next) => {
  const token = req.headers.authorization?.split(' ')(1);
  if (!token) return res.status(401).json({ error: 'No token' });
  try {
    const decoded = jwt.verify(token, process.env.JWT_SECRET);
    req.user = decoded;
    next();
  } catch (err) {
    res.status(401).json({ error: 'Invalid token' });
  }
};
The tests:
describe('Authentication', () => {
  it('allows access with a valid token', async () => {
    const token = jwt.sign({ userId: 1 }, process.env.JWT_SECRET);
    await request(app)
      .get('/protected-route')
      .set('Authorization', `Bearer ${token}`)
      .expect(200);
  });
  it('rejects requests with no token', async () => {
    const response = await request(app)
      .get('/protected-route')
      .expect(401);
    expect(response.body.error).toBe('No token');
  });
  it('rejects a tampered token', async () => {
    await request(app)
      .get('/protected-route')
      .set('Authorization', 'Bearer not-a-real-token')
      .expect(401);
  });
});
Sometimes you want to test the route logic without running JWT verification. You can simulate the middleware to go directly to an authenticated state:
jest.mock('../middleware/authenticate', () => {
  return (req, res, next) => {
    req.user = { userId: 1, email: 'test@example.com' };
    next();
  };
});
It’s worth knowing it exists. It’s worth being careful with that. Mock middleware everywhere and you’ll end up proving that your mocks work, which is a completely different thing. Real tokens for route testing, mocks for the route controller in isolation. It’s worth respecting that line.
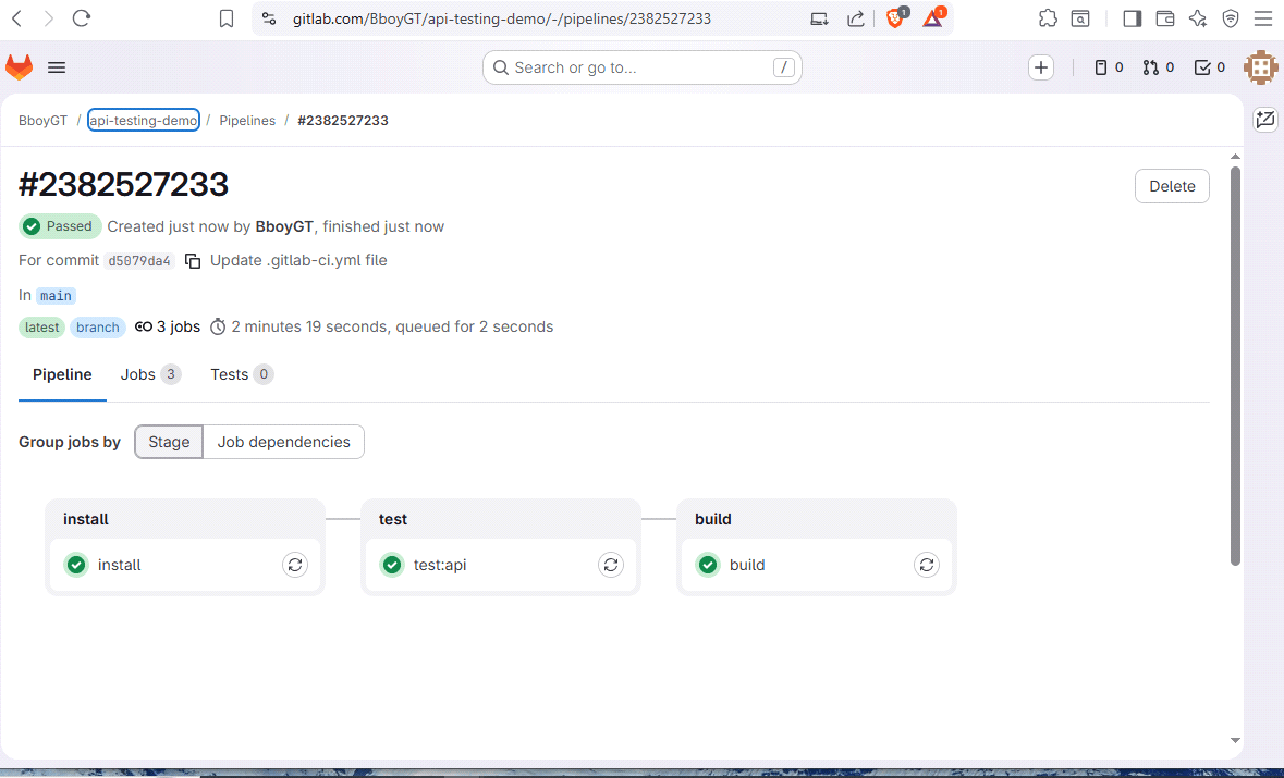
CI/CD integration
If you already have a pipeline from my previous GitLab articleadding API tests is about ten lines:
test:api:
  stage: test
  needs: (install)
  variables:
    JWT_SECRET: "ci-test-secret"
  script:
    - npm run test:coverage
  artifacts:
    when: always
    reports:
      coverage_report:
        coverage_format: cobertura
        path: coverage/cobertura-coverage.xml
GitLab collects the coverage percentage and displays it on the pipeline page and inline in merge requests. JWT_SECRET goes in Configuration > CI/CD > Variables, not in the yml file. Everything committed to .gitlab-ci.yml is readable. Treat it that way.
One thing that catches people in CI, but not locally, is tests that are blocked until they time out. Typically an open database connection that was not closed. Without actually shutting everything down properly, CI just sits there until the job times out and fails. The logs will not say “connection open”. They will simply say that the work exceeded the time limit.
afterAll(async () => {
  await mongoose.disconnect();
  await mongoServer.stop();
});
Both lines. In that order.
GitHub Share Equivalent:
- name: Run API tests
  run: npm run test:coverage
  env:
    JWT_SECRET: test-secret
    NODE_ENV: test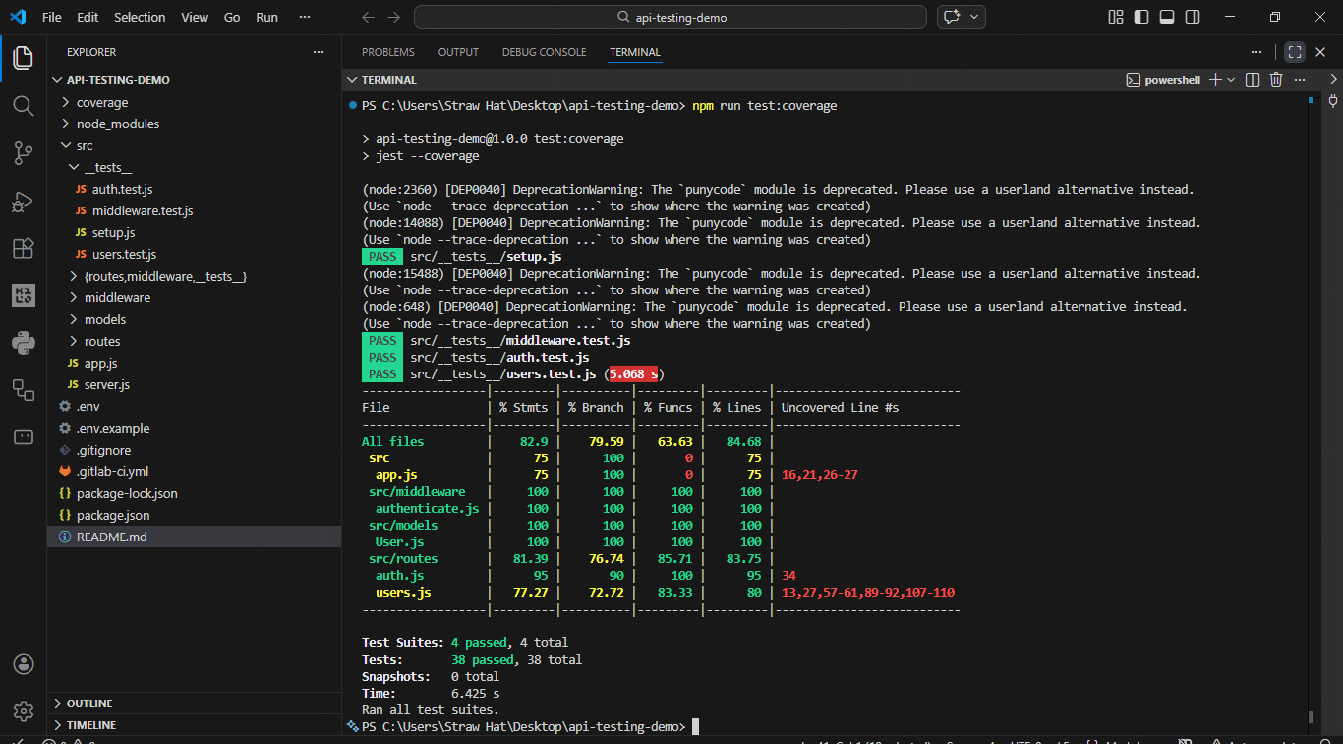
Conclusion
You already knew how to write these tests. The mental shift is to treat the API as a black box where the HTTP request goes in and the HTTP response comes out. Start with a path, cover the happy path and error cases, add database assertions once they pass.
The goal is to be as uncomfortable shipping an untested terminal as you are shipping an untested component. Once there is that discomfort on both sides, the backend is no longer half of the application you ship on faith.
The tool that I just explained in its entirety is open source. Can clone my GitLab repository and try it for yourself.
Source link