Physical Address
304 North Cardinal St.
Dorchester Center, MA 02124
Physical Address
304 North Cardinal St.
Dorchester Center, MA 02124

Sometimes you have to commit to doing something, regardless of whether you think it will work or not. If you don’t fail, you will never learn. If you don’t try, you’ll never start. This was the logic behind my first design-to-print 3D printing project.
This seems like an odd choice considering I don’t have any problems with the Wi-Fi signal.
Why did I do this?
I’ve reached the stage of owning a 3D printer where I’m eager to start designing and printing my own projects. The only problem is that I come from a background with very limited design experience. I did a bit of CAD/CAM in school 25 years ago and played with Blender and similar packages out of pure curiosity.
The furthest I got with what could be considered 3D design was making a bad single-player level in Hammer, the Half life level editor, all those years ago. It never saw the light of day, but the experience gave me a renewed appreciation for 3D design.

So I’ve been looking for ideas to start modeling. My original idea was a clip for a trash can that simply wouldn’t stay closed, but the design will require more thought than I first thought. Then I started thinking about very basic elements that I could design quickly and see results quickly. My goal is to build confidence by doing, rather than poring over CAD software.
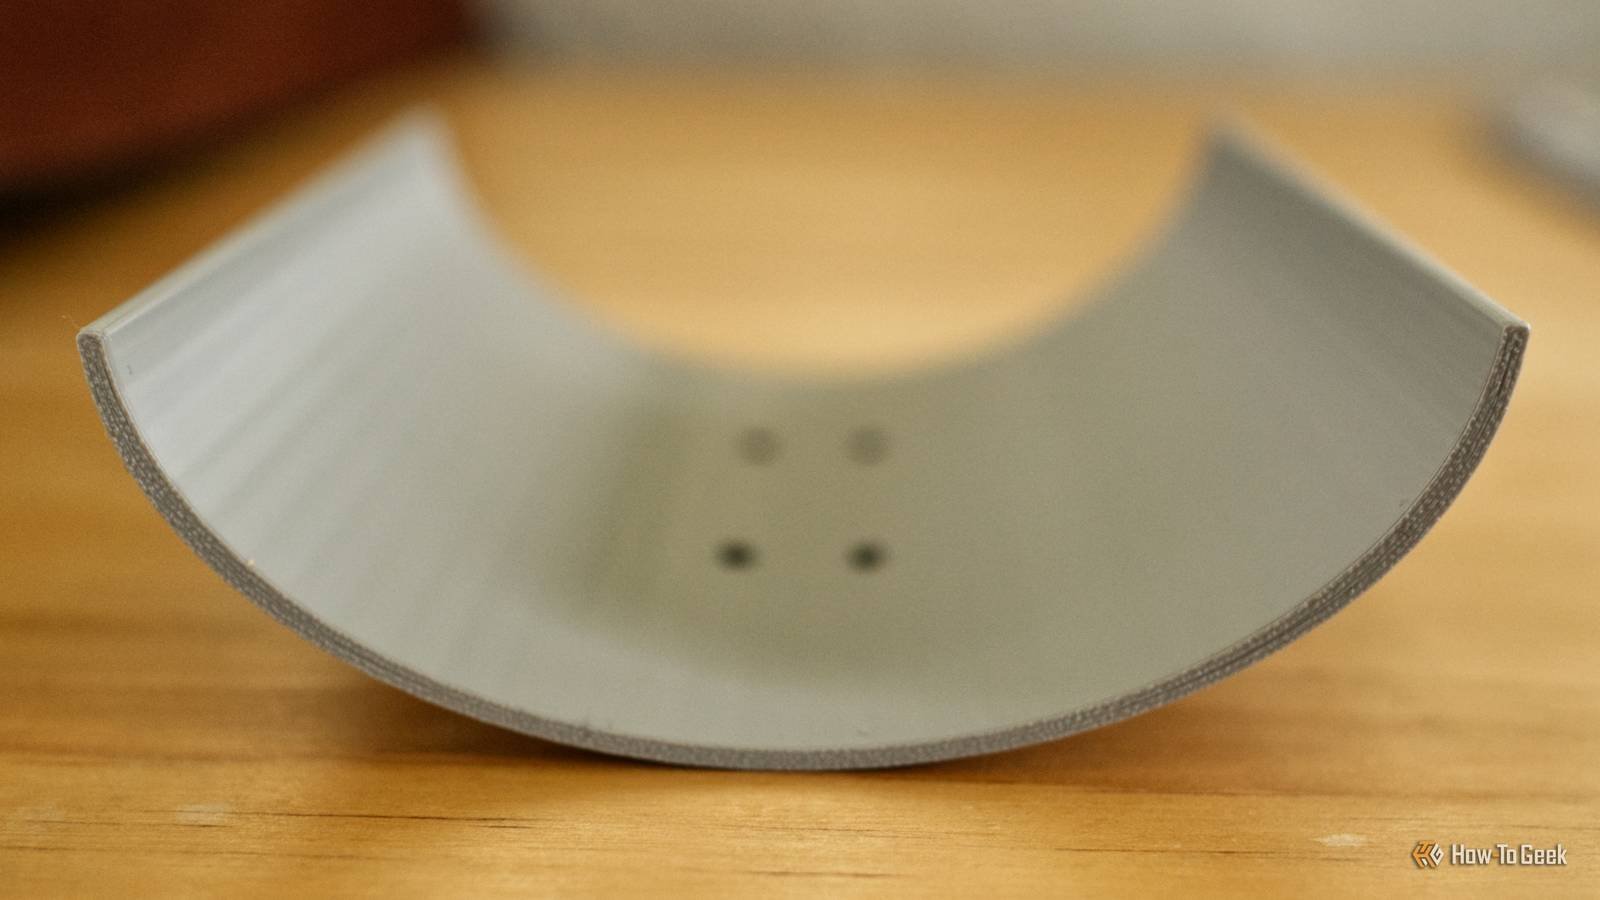
And then I decided on a parabolic Wi-Fi signal booster. These get their name because they use a parabola, a symmetrical U-shaped curve, to focus signals in a specific direction. My house is small and my Wi-Fi signal is good enough, but this seemed like an easy first step.
Starting slow in TinkerCAD
In the past, I have dabbled briefly with TinkerCADAn easy-to-use but limited web-based design application that uses simple primitive shapes. Before starting this project, I also downloaded FreeCADa much more powerful but complex open source design suite.
Although my intention is to eventually move to a more comprehensive package like FreeCAD or Fusion, I quickly returned to TinkerCAD for this project. After measuring my router’s Wi-Fi antenna, I used four shapes to create a parabola with a few holes so I could hold the model in place.

In total, the design took me about ten minutes, after which I downloaded an STL file, opened Bambu Studio, cut it, and sent it to the printer. The final model weighed about 30g of filament and took just over an hour to print. I wrapped the model in aluminum foil to deflect the signal and made some small holes to hold the amplifier in place.
While I expected to be successful, I felt a sense of accomplishment just getting the model off the printing platform. I could have made a similar contraption out of cardboard, but turning a vague idea into a digital file, followed by a physical object, in just over an hour? That’s what it’s about.
To my surprise, it worked.
After wrapping the dish and breaking off the zip ties, I added my booster to one of the outermost antennas on my TP-Link router. I then used Apple’s built-in Wi-Fi diagnostic tool to measure the signal and transfer speed. This is what I saw:

Now I went to the router and removed the dish. Once again, I measured the signal and transfer rate:

What I didn’t expect was to be able to see a noticeable drop in signal strength and transfer rate when I removed the parabola:

The end result was a modest success, with an increase of approximately -10 dB in signal strength and an improvement of up to 300 Mb/s in transfer speed. Since my router is at one end of my house (because that’s where the Internet connection enters the property), I could now realistically print a few more and add them to my router’s other antennas, directing the signal toward the back of the house.
So what did I learn? Always follow your dreams, your Wi-Fi signal will be better for it.
In many ways, this was a perfect first project. A modicum of success from a simple project that cost me a few cents in filament and ten minutes of design.
Now the hard work begins. It’s time to turn my new drive into a pure skill and learn how to model, prototype, and refine objects properly.