While the current cover It’s a great product, it’s expensive, the software can be clunky, and it feels like you’re stuck with relatively soft buttons that aren’t satisfying to press in any way, shape, or form. There are plenty of alternative options, but many of them also pose problems. Using an old tablet seems too slow. Buying a cheap macro pad does not come with customizable buttons like the Stream Deck and using a phone app provides absolutely no tactile feedback.
For a device with a mechanical feel, integrated display, and native home assistant support, you really have to build it. The Stream Deck has dominated the market by essentially being a proprietary plastic box with limited keys and a high price tag. Building one means having unlimited customization, mechanical feel, and open source firmware.

Get complete customization
And incredible tactile response
To get started, you need to pick the brains behind your project, and choosing the ESP32-S3 is the secret sauce to making or breaking your own Stream Deck edition. This specific chip is fantastic because, unlike a Raspberry Pi, it is not too expensive or excessive for its intended use.
It also has a big plus: built-in Wi-Fi and Bluetooth, enough GPIO pins for a button array, and native support for ESP Home or LVGL to control small displays. Thanks to its native USB support, it can also act as a human interface device, meaning your PC treats it as a literal keyboard without the need for drivers.
But the real way to contrast your model with retail competition comes down to the model itself. Opt for tactile bliss instead of the squishy plastic feel of the Stream Deck. For switches, you can choose mechanical keyboard switches like Gateron Yellows or Cherry Reds. The best thing about this is that you can choose any mechanical switch that you enjoy pressing and that feels cool to you. If you want something quiet, you can pick it up. If you want something with a really strong clicking feel, you have that option too. Tactile clicking makes triggering a macro appear intentional, setting your build apart from the competition.
For the display, you can use a cheap 1.9 or 2.4-inch LCD or OLED screen located on the case to show which layer you are on or to display live PC statistics such as CPU temperature, Discord pings, and other notifications. In this case, you can opt for a 3D printed or modified project box. The only thing to keep in mind here is the weight. You don’t want your frame to feel light and hollow, because it might look flimsy. Make sure your DIY platform has weight. You can use metal inserts for this and it gives it a more premium feel than Elgato’s hollow alternative.

- Brand
-
AITRIP
- Connectivity features
-
USB
Using an ESP32 chip is the most economical way to achieve this build. Additionally, the ESP32 even has Wi-Fi and Bluetooth capabilities built into each board, making it ideal for projects where you can’t physically keep the microcontroller connected to your PC at all times.
Next is the software you use, and this is where the power of open source comes to the rescue. Option A is to use FreeTouchDeck or ESP32-StreamDeck. These specific GitHub projects provide a web-based GUI for dragging and dropping macros, making it very easy to set up your Stream Deck alternative.
If you want a next-level setup, using ESP Home and Home Assistant gives you that absolute premium level of integration. Your buttons don’t just control your PC; they really control your house. One button toggles the light to air, dims the room, and starts OBS, all simultaneously.
You can get even more features from its DIY version
Layers are what sets your version apart

One way to take your DIY build beyond the retail competition is to have more supplies without investing in more keys. While Elgato expects you to purchase an XL version for more keys, a $2 component can unlock unlimited potential with your DIY edition.
The biggest limitation of physical macro pads is stagnation. You start with some shortcuts for OBS, but soon you want keys for Photoshop, Spotify, and your smart home. Suddenly even 15 keys feel cramped.
The problem with browsing folders on a standard Stream Deck is that browsing folders usually requires sacrificing some of your precious keys to the Back or Next buttons. It’s slow, it’s manual, and it breaks your muscle memory. If you’re in the middle of a broadcast or a high-stakes edit, you don’t want to go through the menus.
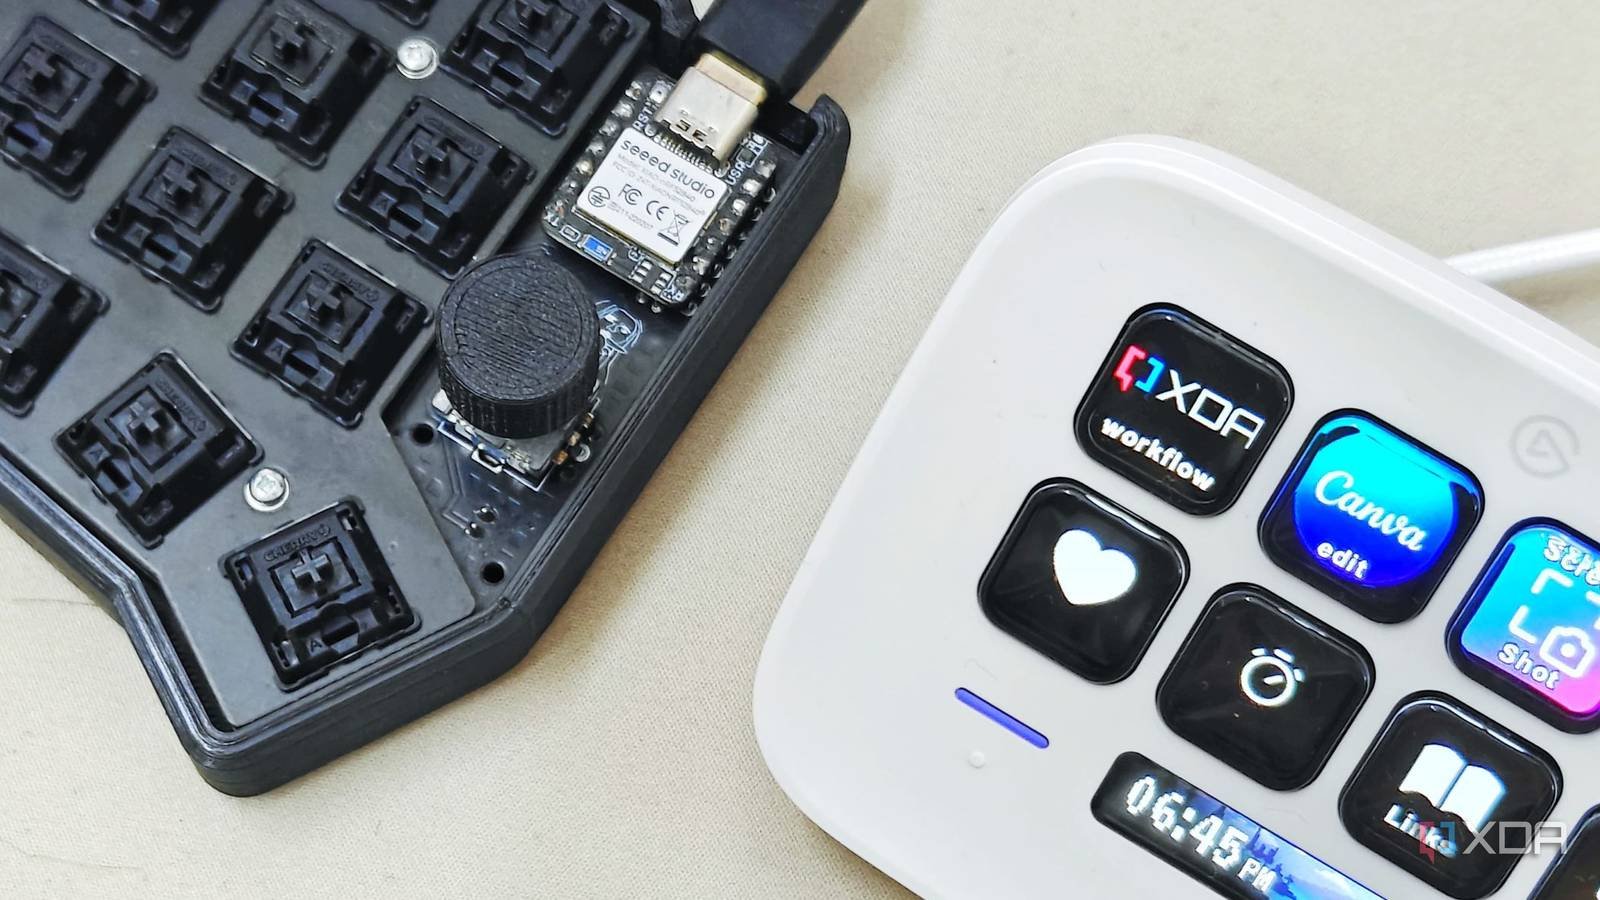
The solution is a rotary encoder. By adding a clickable rotary encoder to your DIY build, you can change the fundamental user interface of your platform. For the scroll action, instead of clicking on folders, simply turn the knob. Each click of the encoder changes the entire 3×3 or 4×4 grid to a new profile, and you can configure profiles like gaming, video editing, office/coding, and home automation to control all of these elements from a single device.
Besides that, the encoder is also a button with push action. You can program the push button to instantly return to your home profile or act as a global silence/panic button. Unlike a touchscreen, an encoder gives you physical dials; You can feel exactly how many layers you scrolled without having to look down.
Using small IPS screens means you have dynamic icons as you turn the knob, the screen, or the small OLEDs under the keys. If you opted for enthusiast mode, updates are instant. You’ll get a clear, high-contrast label or icon for the current layer.
On top of that, if your DIY build is connected via Wi-Fi to Home Assistant or a PC-side script, the screen can show more than just icons on your game layer. It can show you the current temperatures of your CPU. On your smart home layer, it can show you the current brightness of your office lights. The advantages of DIY are that you get complete customization, which is not available on the Elgato Stream Deck.
Save yourself money
and get a better result
For just $30 in parts and an afternoon of soldering, you have a device that outperforms a $150 retail product. In the world of software as a service, there is something deeply satisfying about owning the hardware and code behind one of the products you use every day on your desktop. You’ve got absolutely next-level customization, automation, and integration all in the palm of your hands once you’ve created your own DIY streaming platform alternative.