
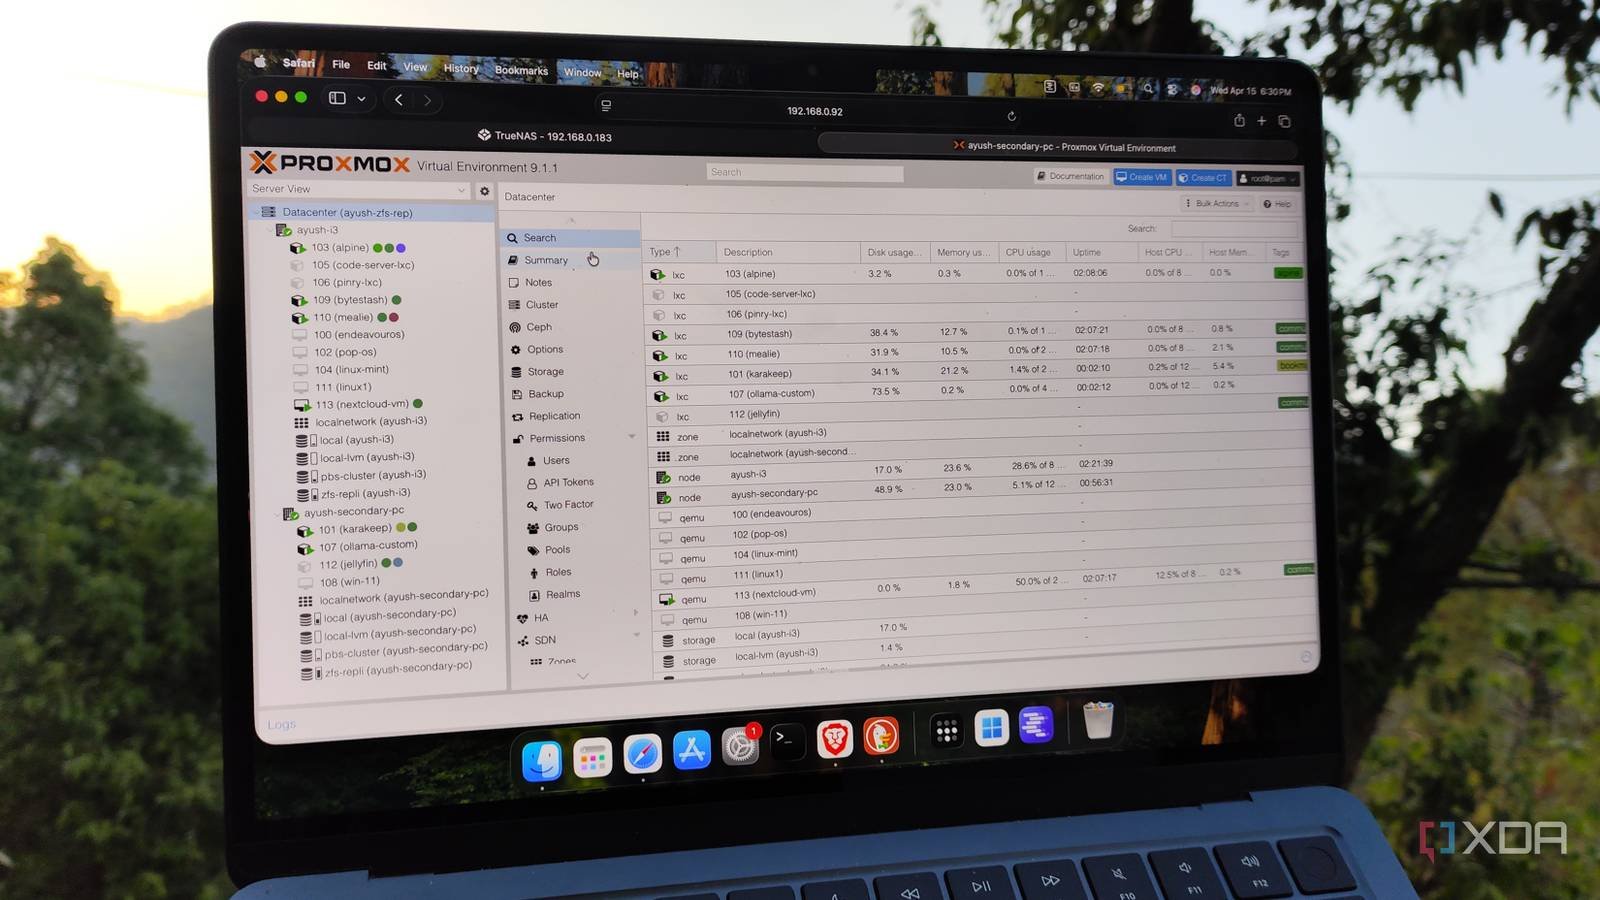
Over the past few years, I’ve installed Proxmox on PCs of all shapes and sizes, including enterprise level serversdinosaur machines, single board computersand gaming laptops. After all, the lightweight nature of Proxmox allows me to run this excellent platform on anything with an x86 CPU, and since it supports Linux containers and KVM-based virtual machines, I can use my PVE-powered systems as hybrid workstations for project creation and self-hosting hubs.
But no matter which version I use, the default Proxmox configuration is far from ideal, to the point that I often modify it as soon as I finish installing the virtualization platform on a new guinea pig device.

By default, Proxmox uses your enterprise repository for updates.
It is impossible to get updates without enabling the non-subscription repository

Although most PVE enthusiasts are familiar with the enterprise repository, I have often seen newcomers leave Proxmox update settings at the default values and wonder why the platform does not receive new packages or security patches. You see, Proxmox configures its enterprise repository for updates upon a fresh installation, and unless you’ve purchased a subscription, your Proxmox node will throw errors if you try to update it.
Fortunately, Proxmox has the subscription-free repository, which includes almost all the tools you need to turn your PVE node into a powerful server. I used to enable it manually by going to the Updates section of the Data Center tab in the past, although I started running the post-installation script from the community-powered Proxmox VE-Helper Scripts package. In addition to fixing the update repository issue, it also removes the subscription issue and disables certain cluster services, that is, once I give it approval. And unless I plan to use a node in a cluster, I almost always let it power them down…
Disabling certain cluster configurations reduces SSD stress
I also enable Log2Ram on old SSDs
Let me be clear: As much as I like HDDs, I configure Proxmox installations on SSDs, in part because my bulky hard drives don’t fit inside half the mini PCs in my arsenal, and also because I have spare SSDs recycled from obsolete machines. But reliability is an issue with recovered drives, especially for SSDs with limited write cycles. Even worse, pve-ha-lrm.service and pve-ha-crm.service tend to frequently write data to the Proxmox boot device. Now, I check the status of SSDs before sending them through the PVE processor and only use cheap drives for test systems, not my main workstation.
Disabling these cluster services not only prevents additional SSD wear on my standalone nodes, but also slightly decreases the resources they would otherwise divert writing to my boot drives. Because I’m a worrier, I’ve also configured Log2Ram on cheaper Proxmox systems that I cobbled together from old components. True to its name, this handy tool writes logs to system memory for the most part and only saves them to the SSD at infrequent intervals, thus reducing write operations a bit more.
I always configure a Pulse agent on new PVE nodes
Pulse is by far the best home lab monitoring utility
Proxmox certainly has a neat web UI for managing containers and virtual machines, but it’s not the best for quickly checking the health and resource consumption metrics of my virtual guests. Fortunately, genius developer rcourtman designed Pulse, a powerful monitoring service that works extremely well with Proxmox. In addition to automatically discovering my LXCs and VMs, it can extract all their essential statistics and even supports remote monitoring for multiple PVE nodes.
And that’s where the aforementioned Pulse agent comes into the picture. I have a centralized Pulse instance on a secondary node that I’ve armed with all the documentation and networking tools (so I don’t destroy it with my home lab experiments), and the agents section within Pulse Configuration generates a new command that I can run on new PVE instances to add them to my monitoring server.

Proxmox default power settings are somewhat under-optimized
I often fiddle with BIOS settings on power-hungry systems.

I have mostly older hardware that powers my home lab, so you’d expect the power consumption rate to be off the charts. But with the right set of optimizations, it is possible to greatly mitigate the power consumption trends of Proxmox equipment. I modify the scaling regulator on each new PVE node, as this setting is responsible for configuring CPU clock speeds during different tasks, including idle workloads. Specifically, I set the scaling slider to save power instead of the default performance profile, which aggressively reduces the processor frequency when not in active use.
Since my Proxmox machines don’t engage in CPU-intensive tasks (at least, unless I specifically use them to host remote gaming VMs) and tend to sit idle most of the time, powersave is the perfect choice for my setup. I also enabled C-States, Eco Mode and ASPM (and disabled boost clocks) in the BIOS of most PVE nodes, just to save a few extra watts each month.
A couple more tweaks for Proxmox enthusiasts

Proxmox’s own strong add-on tools are yet another reason I love their ecosystem, and I always pair new PVE nodes with their Datacenter Manager utility. In addition to providing a clean user interface that understands all the systems in my home lab, it allows me to seamlessly migrate LXC and VMs between nodes, even if they are not clustered. I also connected several PVE machines to my local Proxmox Backup Server instances, although I started clamping down on my snapshot automations after I nearly drowned a mini PC running PBS with unnecessary virtual guest files.
In the meantime, if you’re looking for some tips to improve your VM’s performance, I recommend setting the CPU option to Host. While you shouldn’t use it on cluster nodes that have different types of CPUs, host configuration can improve the responsiveness of your VM. Likewise, changing the Display option to SPICE eliminates cursor lag and general slowness on GUI-loaded VMs, and I wish I’d known about this setting during my early days at Proxmox.