
3D printing is a heady hobby, but it’s very easy to get caught up in printing useless things. The prints look great, but they’re actually useless. So, I set myself the challenge of 3D printing something useful every day for a month. Here are the first four projects I’m starting with.
Garbage bag holder
I’m tired of my trash bags living on the floor.

My wife and I keep our trash bags in our laundry room on the floor next to the washing machine. It’s simply the location in the house we chose six years ago when we moved in, and I’ve never questioned it.
However, when I decided to try challenging myself to 3D print something useful every day for a month, I started looking around the house to see what I could improve on, and that’s when I thought about garbage bags.
A friend of mine had sent me a garbage bag holder 3D model A few days before I thought about the challenge, and that was where the idea began to form in my mind until I finally realized that it was where I wanted to start the challenge.
We bought our trash bags from Sam’s Club in bulk, which means I had to find a model that would support them. So I went looking for one on MakerWorld and found the same model you originally shared.
It’s a pretty simple print that screws to the wall, and I’ll be printing two of these since Sam’s Club trash bags come in packs of 2. Printing should only take a few hours and it’s one less thing on the floor in the house.
shower soap dish
Sometimes the simplest projects make the biggest difference

My wife came to me the other day and told me that the soap dish we had been using in the shower for the past few years needed to be thrown away. I immediately went to MakerWorld He looked for a new model and couldn’t find one that fit his specifications (or our shower caddy).
This was a project I decided to design myself and it was actually pretty simple. I started opening up Shar3D on my MacBook Pro and entering the dimensions I needed the soap tray to have. From there, I simply designed some rectangular drainage holes and that was it.
A shower soap dish may seem like a very simple thing, and it is. But it’s also something that will make a big difference for us. We use bar soap, so having a soap dish is important for our shower.
The tray I designed and printed allows the soap to drain properly so it’s not left in a puddle of water. It is also designed to be as wide as needed and as deep as the shower caddy.
I was also surprised that the printing only took an hour to complete. So, 15 minutes to design, 55 minutes to print and I had a new soap dish for the shower.
One less thing sitting at my work table

I have a lot of power tools.and even more power tool batteries. Yes, I probably have too many batteries. But that’s not a problem if I keep the batteries organized.
This is a project I did when I bought my first 3D printer many years ago, but now that I’ve redone my workshop, I need to use it again.
I have both Milwaukee M12 and RYOBI 18V ONE+ batteries in my store. So, I designed separate holders for each battery. to mount on the wall. The design took me quite a while, but I also used an Ender 3 V2 style printer in 2022 to make them.
Nowadays, media prints in much less time and with a much better surface finish. Later in the month I will be 3D printing wall mounts for my garden tools, including my Greenworks 40V blower, and those mounts will be designed very differently.
But at the end of the day, as long as I get things off my work table and mount them on the wall, I’m happy.
Label printer support
No more labels falling behind my desk

I have had a thermal label printer for several years for my small business. I never had a label printer stand that I really liked, until I printed my own.
My favorite thermal label printer is the MUNBYN 130Bwhich I love. It works well, prints fast and with great quality. The problem is that there is no good way to store fan-folded labels with it.
So I set out to find a 3D model that would fit. Sure, I could design this myself, and maybe one day I will, but I found a fantastic model that solves the exact problem I need. The print itself only required a few hours and a couple hundred grams of filament.
Once printed, assembly was very simple and the printer simply sat on the shelf it was designed for. Now I can print labels and not worry about the stack falling behind my desk and making a huge mess. This impression was definitely worth it.
-
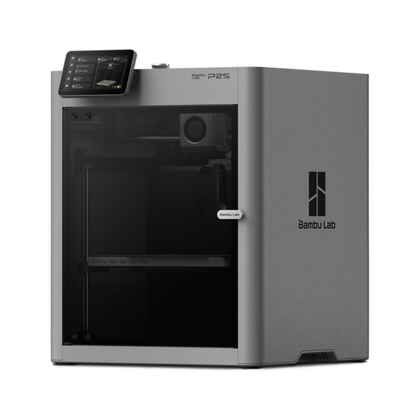
- Construction volume
-
256x256x256mm
- Print speed
-
600mm/s
- Brand
-
Bamboo Laboratory
- Maximum hot end temperature
-
300C
- Maximum bed temperature
-
110C
- Nozzle
-
Hardened 0.4mm
The Bambu Labs P2S 3D printer is ready to use and can start printing within 15 minutes. It features up to 20-color printing with the AMS unit, has an improved built-in camera for remote monitoring and time-lapses, and has a closed body for printing even with high-temperature filaments.
-

- Brand
-
FlashForge
- Construction volume
-
220x220x220mm
- Connectivity
-
Wi-Fi, USB, Ethernet
- Dimensions
-
16″ deep x 14″ wide x 18″ tall
- Weight
-
24.25 pounds
The FlashForge AD5X 3D printer is one of the most affordable multi-color 3D printers on the market. It features a 4-spool automatic filament changer built into the side of the unit, with no external accessories required. With an open frame, you can easily print materials such as PLA, PETG, and many others. It offers 1-click auto leveling, prints at up to 600mm/s and comes with a 0.4mm nozzle pre-installed with the option to change it to a 0.25mm, 0.6mm or 0.8mm nozzle depending on your needs.


This is just the beginning of the challenge.
In fact, I plan to print something useful every day for 30 days to really test myself (and my printers). It will help me get out of my comfort zone and also solve many problems along the way.
By the end of the challenge, I hope to have solved 30 different problems in my house. Some big, some small, but all useful.
If you want to follow me and follow the challenge, follow me on YouTube. @CreadoTaller where I will soon share daily shorts of the challenge here.